


Black and Grey Tattoo Mastery: A Guide to Timeless Art
- Dec 4, 2025
- 15 min read
Updated: Dec 30, 2025
📌 Key Takeaways
Black and grey tattoo mastery reveals itself months after the appointment, when contrast holds and focal points stay distinct at arm's length.
Healed Photos Prove Mastery: Artists who show work months or years later design for longevity, not just fresh-ink social media impact.
Five Portfolio Markers Matter: Smooth gradients without banding, solid blacks without patchiness, clean edges, strategic negative space, and convincing texture separate elite work from average.
Fresh Ink Deceives Everyone: Tattoos soften one to two shades as skin regenerates over six to eight weeks—skilled artists plan for this healed result.
Miami Sun Demands Protection: UV radiation fragments pigment molecules, compressing value range over time unless you apply SPF 50+ to exposed tattoos.
Scale Determines Detail Survival: Complex portraits need six to eight inches minimum to maintain recognizable features after healing and years of wear.
Evaluate the outcome first, then judge whether the artist's process proves the work was designed to age well.
Miami residents planning realistic black and grey pieces will gain clarity on technical quality markers here, preparing them for the detailed consultation guide that follows.
Three months after your appointment, you catch your reflection in a mirror. The tattoo still reads clean—clear focal points, smooth transitions from shadow to light, and a composition that commands attention without shouting. This is what timeless looks like.
Most people make their decision based on fresh-ink photos. The problem? Fresh ink always looks sharp. The real question is what happens after your skin heals, after the initial excitement fades, after you've lived with the piece through a Miami summer or two. That's when mastery reveals itself.
This is the "working backwards" lens: evaluate the outcome first, then judge whether the artist's process and portfolio prove the work was designed to heal well. Choosing a black and grey artist isn't about finding someone with a tattoo machine. It's about finding someone who understands how ink settles into skin over weeks, months, and years—and designs accordingly. This guide walks you through what separates average work from true mastery, so you can make a confident decision about the long-term legibility of your body art.
What Makes a Black and Grey Tattoo "Timeless" After It Heals
A timeless black and grey tattoo maintains three qualities long after the appointment: it reads clearly at arm's length, the focal points stay distinct, and the contrast between light and dark holds up over time.
Fresh ink deceives. Every tattoo looks crisp when you walk out of the studio. The real test comes six weeks later, when the top layer of skin has completely regenerated and the ink has settled into its permanent position. At that point, a well-executed piece still tells its story clearly. A rushed or poorly planned tattoo starts to blur.
"Readable at arm's length" means someone can identify the subject and understand the composition from a normal viewing distance—roughly 2 to 2.5 feet away. If your tattoo requires close inspection to make sense of the design, something went wrong during planning or execution. Strong black and grey work maintains visual hierarchy: the eye knows exactly where to look first, second, and third.
The best black and grey artists show you healed work in their portfolios. Not just fresh photos from the same day, but images taken months or years later. This proves they design for longevity, not just for social media impact.
Black and Grey Tattooing, Defined Simply
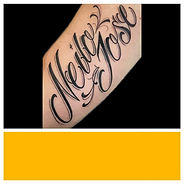
Black and grey tattooing uses black ink and diluted tones to create monochromatic art on skin. Think of it like charcoal drawing—instead of using multiple colors to create depth and dimension, the artist relies entirely on the interplay between light and shadow.
Value range refers to the full spectrum from pure black to the natural tone of your skin. A skilled artist uses every shade in between to build form, texture, and realism. Solid blacks anchor the darkest shadows. Mid-tones create volume and dimension. The lightest areas, where ink is most diluted or absent entirely, represent highlights and negative space.
Contrast drives everything in black and grey work. Without strong contrast—clear separation between darks and lights—a tattoo flattens out. The image loses depth. Details become hard to distinguish. This is why mastery matters: an experienced artist knows exactly where to place the deepest blacks and where to let the skin breathe.
Realism sits within the broader category of black and grey tattooing. Not all black and grey tattoos aim for photographic accuracy—traditional styles, geometric designs, and illustrative work all use the same monochromatic palette. But realistic black and grey portraits, wildlife, and memorial pieces require an additional level of technical precision because they're judged against real-world references.
The Five Technical Signs of Mastery to Look For in Portfolio Photos
When reviewing an artist's portfolio, focus on these five indicators of technical skill:

1. Smooth gradients without visible banding. Run your eyes along the shaded areas. If you see distinct lines or "stair-step" transitions where one tone abruptly shifts to another, that's a technical flaw called banding. Masterful shading flows seamlessly from dark to light, like smoke or fog. The transitions should be so gradual that you can't pinpoint where one value ends and another begins.
2. Solid, even blacks with no patchiness. Black ink should look dense and uniform, not spotty or inconsistent. Check the darkest areas of the tattoo—usually the deepest shadows or outlines. If you see lighter patches within what should be solid black, the artist either didn't pack the ink properly or used inconsistent pressure. These areas will fade faster and may require touch-ups sooner than well-saturated blacks.
3. Clean edges and precise line control. Where the design calls for sharp edges—the rim of a hat, the edge of a building, the contour of a face—the lines should be crisp and intentional. Shaky or wobbly lines signal inexperience or poor hand control. This doesn't mean every tattoo needs hard edges everywhere; many realistic pieces benefit from soft, blended edges in certain areas. The key is intentionality. The artist should control exactly where edges are sharp and where they're soft.
4. Strategic use of skin breaks and negative space. Negative space—areas where the natural skin tone shows through—isn't just empty space. It's an active design element. In black and grey realism, skin breaks often represent the brightest highlights: the glint in an eye, the reflection on water, the shine on metal. An artist who understands negative space knows when to hold back and let the skin do the work, rather than over-tattooing every square inch.
5. Convincing texture in realistic subjects. This is where elite artists separate themselves. Can you visually feel the difference between skin, fur, fabric, and metal in the tattoo? Does hair look like individual strands rather than a flat mass? Does fabric show folds and weight? Texture realism requires an understanding of how light interacts with different surfaces, and the technical skill to recreate those interactions with ink and needles.
Compare what you see in portfolios against the black and grey gallery at Fame Tattoos to calibrate your eye for these quality markers.
Grey Wash Explained: The Technique Behind Smooth Shadows
Grey wash is the foundation technique that creates those seamless gradients you see in high-quality black and grey work. At its core, grey wash involves diluting black ink with distilled water or a specialized solution to create lighter tones, then layering these tones strategically to build depth.
An artist working in grey wash essentially creates a custom "palette" of values before or during the tattoo session. They might prepare several dilution ratios—perhaps one part ink to three parts solution for mid-tones, one part to five parts for lighter greys. Some artists mix as they go, adjusting the dilution based on what the design requires in that specific area.
When grey wash looks choppy or inconsistent in photos, common reasons include inconsistent value planning where shadows don't follow a clear light source, overworking certain areas which can leave uneven results after healing, or poor transitions between values where the tattoo jumps from dark to light without true mid-tone bridges.
The choice between single needles and magnum configurations (groups of needles arranged in rows) affects the look and feel of the shading. Single needles allow for extremely fine detail and delicate work—you might see them used for subtle transitions on a portrait's face or for fine hair strands. Magnums cover more area more quickly and are commonly used for larger shadow areas or backgrounds where you need smooth, even coverage without spending excessive time.
Neither configuration is inherently better. The right tool depends on what that specific part of the design needs. An experienced artist switches between needle types throughout a single session, matching the tool to the task.
"Just got my tattoo done yesterday at Fame Tattoo. Ernie was my artist and he did an amazing job. They designed my tattoo, with my input, a little over a month ago. They were able to bring my vision to life better than I originally imagined." — Brandon R.
Healed vs. Fresh: The Reality Check Most People Skip
Fresh tattoos look sharper than healed tattoos. Always. This isn't a flaw—it's biology.
Social media has created what you might call a "fresh-ink bias." When you walk out of the studio, ink saturates both the outer epidermis and the deeper dermis, making the contrast look its most dramatic. Over the next four to eight weeks, your body sheds the inked epidermal layer, revealing the permanent pigment anchored beneath. This natural filtration by your own skin creates a subtle softening effect. The blacks remain dark, but they lose that fresh, almost wet appearance. Mid-tones lighten slightly as a thin layer of new skin forms over the ink.
Typically beginning around day three or four and extending into the second week, your tattoo will go through a scabbing or peeling phase. This is completely normal. The skin is shedding the damaged surface layer and rebuilding. At this stage, the tattoo often looks dull, cloudy, or patchy. This is temporary. Once the peeling stops and the skin fully regenerates—usually by week four to six—you'll see the true healed result.
What should you expect after full healing? A slight mellowing of all tones. Deep blacks settle into a rich, matte finish rather than a glossy fresh look. Highlights may appear slightly less stark. Fine details remain visible but integrate more naturally with the surrounding skin. This is what "settling in" means, and it's why good artists design with the healed look in mind, not just the fresh appearance.
Normal Changes vs. Red Flags
Common, expected shifts:
Some lightening as the tattoo settles
Slight softening of ultra-fine edges
A more "matte" look compared to fresh shine and swelling
Potential concerns worth discussing with your artist:
Large areas that heal noticeably blotchy
Loss of structure where the focal point becomes unclear
Persistent irritation beyond a typical healing window
An artist who routinely shows you healed photos—not just fresh work—demonstrates they stand behind how their tattoos age over time. That confidence matters. For a deeper look at how black and grey tattoos change during healing and what's normal versus concerning, see Healed vs. Fresh Black and Grey Tattoos: What to Expect.
Longevity in Real Life: How to Keep Contrast for Years
Miami sun is not negotiable. UV radiation breaks down tattoo pigment molecules over time. If your tattoo is regularly exposed to UV rays, the contrast will fade faster than on a tattoo that's typically covered. UV radiation photochemically fragments pigment particles within the dermis, allowing your body’s immune system to carry away the smaller debris. This accelerates the fading of mid-tones and reduces the overall value range.
Protecting your investment means applying broad-spectrum SPF 50 or higher to tattooed areas whenever they're exposed to sun. This simple habit extends the life of your contrast by years. The alternative is watching your carefully planned value range compress as the blacks lighten and the mid-tones wash out.
Placement matters for longevity beyond just sun exposure. Areas subject to high friction—inner arms, hands, feet, anywhere that rubs against clothing or other skin repeatedly—will naturally experience more wear over time. The ink doesn't disappear, but the edges may soften and the fine details may blur faster than on areas with less friction.
What to Expect Across Time
Individual results vary based on skin type, placement, sun exposure, and aftercare, but here's a general framework:
Fresh (day-of / first week): Highest contrast, sharpest micro-detail, strongest blacks.
Healed around 1 year: Values look more integrated into the skin; edges soften slightly; contrast remains clear if structure and spacing were planned well.
Healed around 5 years: Tattoos often rely more on strong shapes and clean value separation; pieces with smart negative space and solid anchors tend to read better.
Healed around 10 years: Composition and contrast strategy dominate. Tattoos designed with strong silhouettes, intentional spacing, and clear focal points typically remain more legible.
Touch-ups are a normal part of tattoo ownership, not a sign of failure. A high-quality black and grey tattoo might benefit from a touch-up session five to ten years after the original work, particularly in areas that see heavy sun exposure or friction. Some people never need touch-ups. Others choose to refresh their pieces periodically to restore the original contrast levels.
Think of touch-ups as maintenance, similar to repainting a cherished piece of art. The fact that something requires periodic maintenance is a function of skin cell turnover and external exposure, not a reflection of the initial application's quality. For detailed information on what affects black and grey longevity and when to consider a touch-up, read Do Black and Grey Tattoos Fade? The Truth About Longevity.
Safety Is Part of Mastery: What a Professional Studio Should Show You
In Florida, both the establishment and each individual artist must be licensed. Walking into a professional tattoo studio, you should see evidence of licensing and hygiene protocols immediately. This isn't about being suspicious—it's about making an informed choice regarding a medical procedure that punctures your skin thousands of times.
The Florida Department of Health requires tattoo establishments to meet specific health and safety standards, including proper sterilization procedures, waste disposal protocols, and bloodborne pathogen training. Individual tattoo artists must also hold their own licenses, which require training and examination.
These licenses should be visibly posted, not hidden in a back office. If you don't see them displayed, ask. A legitimate professional will show you without hesitation.
Single-use needles are non-negotiable. Every needle that touches your skin should come from a sealed, sterile package that the artist opens in front of you. Reusable equipment that does touch your skin—like tube grips or machine parts—should go through a medical-grade autoclave sterilization cycle between clients, with sterilization indicators visible.
Barrier protection means the artist covers any surface or equipment they might touch during the procedure with disposable plastic barriers. Spray bottles, machine cables, work surfaces—anything that might be contaminated gets either wrapped or disinfected between clients.
You should receive clear aftercare instructions before you leave. These instructions explain how to clean the tattoo, what products to use, and what warning signs might indicate a problem. If an artist rushes you out the door without covering aftercare, that's a red flag.
If you have concerns about healing, develop signs of infection (increasing pain, significant swelling, fever, pus), or have questions about whether your tattoo is healing normally, seek medical attention. The FDA provides helpful consumer guidance on tattoo safety and when to consult a healthcare provider.
"As soon as I walked into the location I noticed the cleanliness and the importance they give to their workspace to be clean, which to me is my first priority. Everything Jill used to do my piercing (needle, piercing, etc.) was sterilized." — Camila P.
Design Process: Turning Your Idea Into a Piece That Ages Well
The consultation matters more than most people realize. This is where you communicate your vision, and—critically—where an experienced artist educates you on what will and won't work in black and grey.
A typical design process includes several distinct phases:

Consultation and reference alignment: Bring reference photos—not just one, but several that show different angles, lighting conditions, and details of what you're trying to capture. If it's a portrait, provide high-resolution images with good lighting and clear facial features. If it's an object or scene, show the artist what aspects matter most to you—the texture, the mood, the specific details you want emphasized.
Sizing for readability: Be honest about placement and sizing. A talented artist can shrink or enlarge a design, but not all subjects work at all sizes. Fine details require sufficient space to execute properly. A complex portrait might need at least six to eight inches of space to maintain the level of detail that makes it recognizable. Trying to cram too much information into too small an area is a recipe for a muddy, unclear tattoo once it heals.
Composition choices: The artist decides where the darkest anchors go, where the mid-tones carry form, and where open skin provides "light." Choosing subject matter that translates well to black and grey requires understanding what makes the technique effective. It excels at subjects with natural contrast and form—portraits, animals, architectural elements, memorial pieces, anything where light and shadow define the subject. Designs that rely heavily on color variation to distinguish different elements can be trickier; without color, the artist needs to create separation through value contrast alone.
The "cheap and fast" approach backfires in black and grey work more dramatically than almost any other style. Why? Because smooth gradients and clean saturation require time. Rushing the shading process leads to patchy blacks, choppy transitions, and inconsistent tone. There's no shortcut to laying down the multiple passes needed for seamless grey wash. An artist who quotes you a suspiciously low price or promises to finish a complex piece in an impossibly short time is either inexperienced or cutting corners you'll regret.
Expect a custom design process if you're working on a significant piece. A professional artist doesn't just trace your reference photo onto a stencil and start tattooing. They consider composition, placement on the specific contours of your body, which elements to emphasize for maximum impact, and how the design will age over time. This planning phase—sometimes spread across multiple meetings—separates permanent art you'll treasure from a permanent mistake.
"Had a portrait of my mom done and I couldn't be happier with how it came out. The detail in the tattoo is impeccable. Omar and his team are incredible and it's a family environment. I would recommend anyone who wants a tattoo to go to Fame Tattoos." — Roberto M.
Black and Grey vs. Miami Black and Grey Realism: When the "Miami" Standard Matters
Black and grey is the technique—the use of black ink and diluted tones to create monochromatic art. Miami Black and Grey Realism is a culturally distinct style within that technique, characterized by specific aesthetic choices that evolved in South Florida's tattoo scene.
The Miami approach typically involves larger scale, higher contrast, and bold compositional choices. Where traditional black and grey might use subtle gradients and soft transitions throughout, Miami realism often pushes the value range to its extremes. Blacks are pushed darker, highlights are more dramatic, and the overall composition tends toward visual impact that reads clearly even from a distance.
Scale matters in Miami realism. These pieces are often designed to cover significant areas—full sleeves, large back pieces, chest panels. The style doesn't translate as well to small, delicate work. If you're considering a discreet, subtle tattoo, traditional black and grey techniques might serve you better. If you want a statement piece that commands attention, the Miami realism approach could be the right fit.
The distinction isn't about one being better than the other. It's about matching the style to your goals. Someone seeking a soft, intimate memorial portrait might prefer traditional black and grey. Someone wanting a bold, larger-than-life representation might lean toward the Miami aesthetic.
Understanding this distinction helps when you're reviewing portfolios. An artist who specializes in Miami realism might not be the best choice for a delicate, understated piece, even though they're technically skilled in black and grey. Conversely, an artist known for subtle, fine-line black and grey might not deliver the punch you're looking for if you want that distinctly Miami look.
For a thorough explanation of what defines Miami Black and Grey Realism as a distinct subcategory, including its historical roots and technical characteristics, see Defining the Style: What Makes Miami Black and Grey Realism Unique?. If you're curious about the cultural influences that shaped this style, How the Wynwood Art Scene Influenced Miami Black and Grey Realism traces the connection between street art and tattoo culture in South Florida.
Your Next Step: Book a Consultation in Hialeah Serving Miami
If you're ready to move from research to planning your black and grey piece, the next step is a consultation. This conversation—whether in person or during a walk-in—gives you the chance to discuss your idea, see how an artist interprets it, and gauge whether their approach matches what you're looking for.
What to bring: reference photos showing multiple angles and lighting conditions of your subject; a clear idea of placement on your body (you can be flexible, but have a starting point); your schedule and any constraints that affect timing; and realistic expectations about budget. Quality black and grey work represents an investment. If an initial quote seems higher than you expected, understand that you're paying for skill, experience, and the time required to execute smooth, lasting work.
At Fame Tattoos, walk-ins are welcome on a first-come, first-served basis. However, booking an appointment guarantees availability and ensures the artist has dedicated time to focus on your consultation without interruption. For custom design work, scheduling in advance is strongly recommended.
The studio is located at 1409 West 49th St. Suite 1, Hialeah, FL 33012, serving the greater Miami area. Hours are Monday through Saturday, 10:00 AM to 10:00 PM, and Sunday, 12:00 PM to 6:00 PM. You can book your appointment online or submit a tattoo request form with details about your project.
Once your piece is complete, proper aftercare determines how well it heals and how long the contrast holds. For comprehensive guidance on protecting your investment during the critical healing period, review the tattoo aftercare instructions before your appointment so you're prepared.
Choosing an artist for permanent art isn't a decision to rush. Take the time to review portfolios, particularly healed work. Ask questions about their process, their experience with the specific style you want, and how they plan for long-term results. The difference between a tattoo you're proud to show and one you feel the need to explain or cover up often comes down to these upfront decisions.
Black and grey mastery isn't about filters or tricks. It's about understanding how ink settles into skin, how contrast degrades over time, and how to design compositions that maintain their visual impact years after the appointment. When you find an artist who demonstrates that understanding through healed portfolio work, transparent process, and a commitment to hygiene standards, you've found someone worth trusting with permanent art.
Disclaimer: This article provides general information about black and grey tattoo mastery for educational purposes. Individual circumstances vary significantly based on factors like skin type, tattoo placement, sun exposure, and aftercare routine. For personalized guidance tailored to your design goals and healing needs, it is recommended to consult with a qualified professional.
Our Editorial Process: At Fame Tattoos, every piece of educational content is created with one goal: to help you make confident, informed decisions about your body art. Our articles are written by experienced tattoo professionals and reviewed for accuracy, clarity, and real-world relevance, so you can trust the information as much as you trust the art we create.
About the Fame Tattoos Team: The Fame Tattoos team is a Miami-area studio collective focused on high-fidelity custom work—especially black and grey realism and portrait tattooing. Our educational content is created from real studio experience and reviewed for clarity so you can make confident decisions before you get inked.
References:
[1] Florida Department of Health: Tattoo Establishment Licensure Requirements
[2] Florida Department of Health: Tattoo Artist Licensure
[3] U.S. Food and Drug Administration: Think Before You Ink: Tattoo Safety
.jpg)
.jpg)

.jpg)
.jpg)

.jpg)
.jpg)
.jpg)
.jpg)